Sell a Pass
The process for purchasing a pass varies slightly depending on the type of pass. Check out the drop-down menu for the type of pass that you're looking to sell.
Sell a Flex Pass or Membership from your admin panel
From the top navigation bar, click More --> Passes.
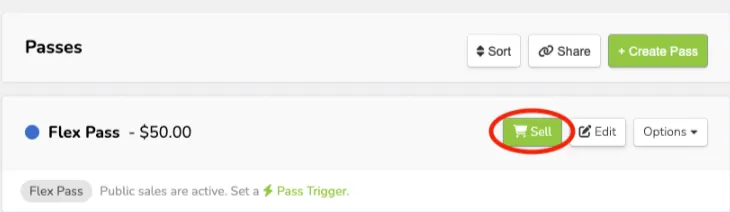
Next to the pass that you'd like to sell, click Sell.
On the right side, choose the number of passes that you wish to sell.
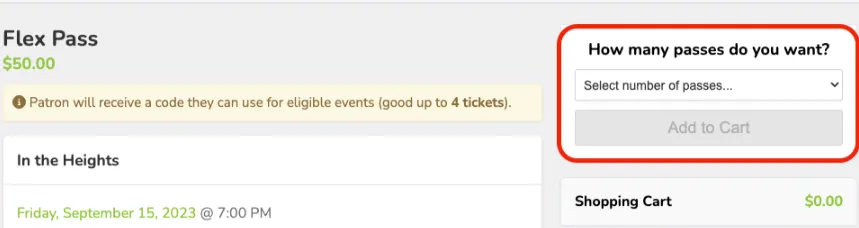
Click Add to Cart.
Click Checkout to accept payment. Choose Change number of passes to do just that.
Under Personal Information, insert as much or as little information as your organization desires. We recommend providing at least a name and email to facilitate easier tracking of this order later on.
If they have been a patron with you before, you can click the green Magnifying Glass button (🔍) and look up their name/email. Then, click Select, and all the information on file will autofill; you can add or update as needed.
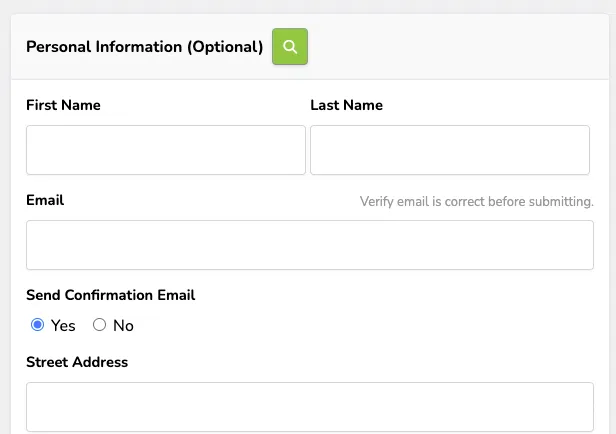
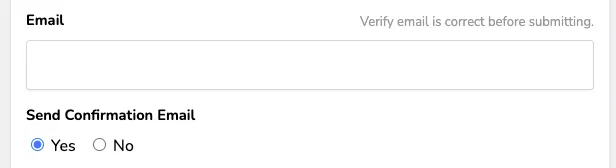
Within Personal Information, choose whether or not you'd like to send a confirmation email for the purchase. The default is yes.
Optional: Add a donation or discount code to the order. (Check out the links at the bottom of this article)
From the checkout screen, you have three main options:
Credit, Cash, and Comp. Select the button for the type of sale you'd like to make. To learn more about each type, check out this article.
Suggested Article: Overview of payment options
After you finalize the payment, you will be taken to the confirmation screen, where you can view and print the patron's pass as a card.
You can select the patron's name (under Holder Information) to be brought to the patron's profile.
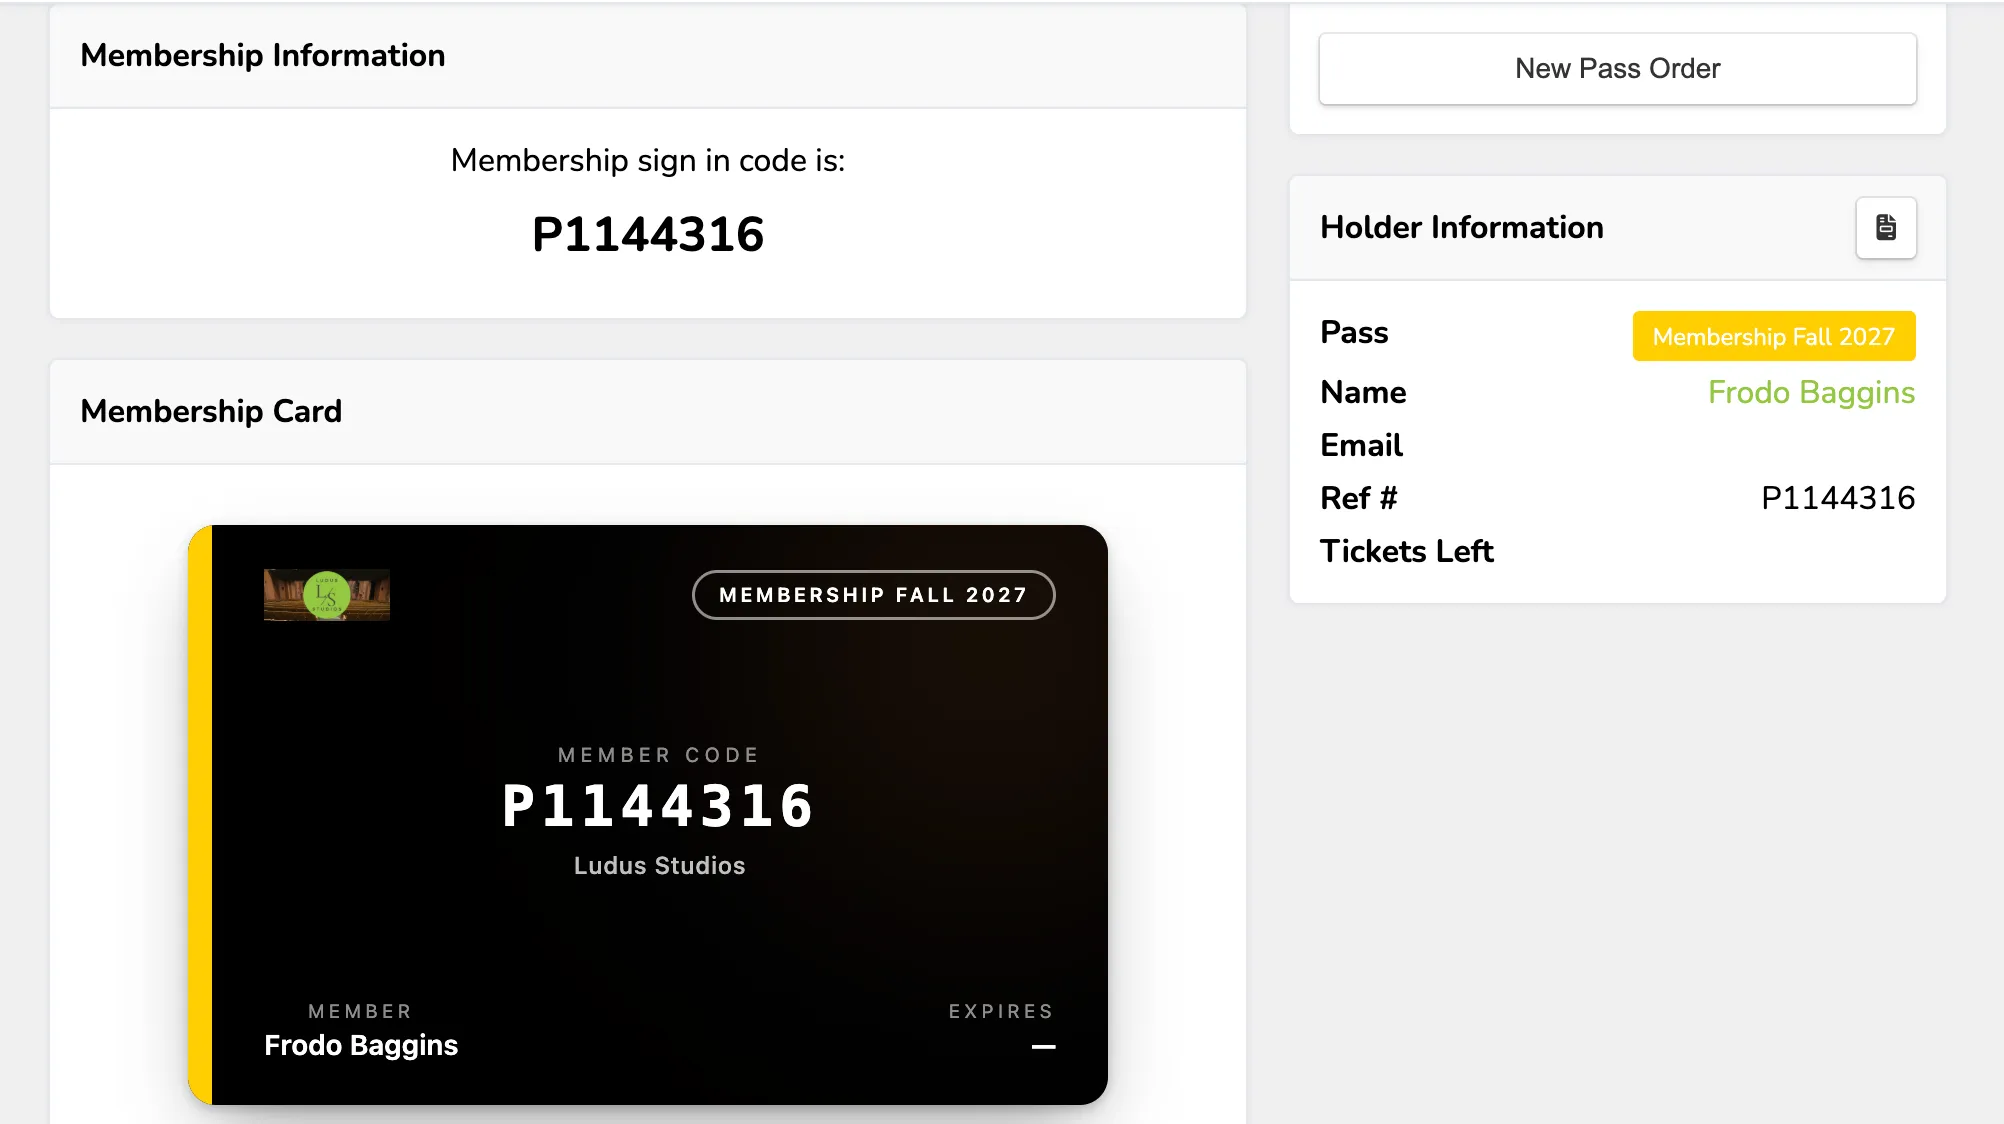
The Patron can also view and print this card from their order confirmation email.
Sell a Season Ticket from your admin panel
Season Tickets are a type of pass where the patron chooses their tickets for each event when they purchase the pass. Check out the steps below to learn more.
From the top navigation bar, click More --> Passes.
Next to the Season Ticket that you'd like to sell, click Sell.

Choose the number of passes from the dropdown menu and click Continue.
From the selection screen, use the list of events on the left-hand side to add tickets to the pass. Each Season Ticket has different settings, so select events according to the pass settings. On the selection screen, use the event list on the left. Some require you to add a ticket from each event before you can complete the purchase. Use the box on the right-hand side to view the number of tickets remaining and/or any missing requirements. See the image below for a guide.
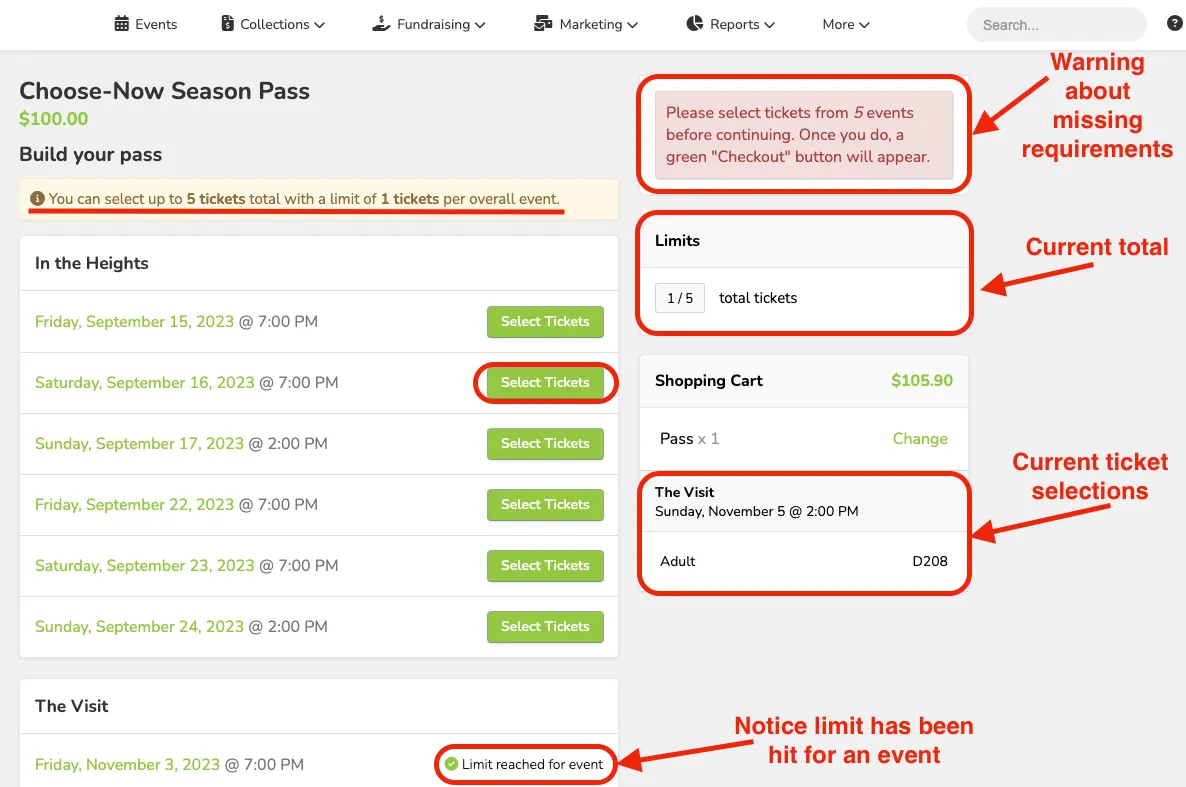
Once you have fulfilled all of the requirements on the Season Ticket, you will see a green Checkout button in the upper right-hand corner. Click it to continue.
Under Personal Information, insert as much or as little information as your organization desires. We recommend at least a name and email to make tracking this order easier later on.
If they have been a patron with you before, you can click the green Magnifying Glass button (🔍) and look up their name/email. Then, click Select, and all of the information that is on file will autofill, and you can add/update as needed.
Within Personal Information, choose whether or not you'd like to send a confirmation email for the purchase. The default is yes.
Optional: Add a donation or discount code to the order. (Check out the links at the bottom of this article)
From the checkout screen, you have three main options:
Credit, Cash, and Comp. Select the button for the type of sale you'd like to make. To learn more about each type, check out this article. Suggested Article: Overview of payment options
Once you finalize the payment, you will be taken to the confirmation screen. From there, choose whether you'd like to print the tickets, send them digitally (email or text), or mark them for Will Call. This option will apply to all tickets within the Season Ticket. Suggested Article: Overview of retrieval options
At this time, each type of pass must be purchased in a separate transaction. If you are buying multiple of the same pass, you can do that in one transaction. But different passes must be purchased separately.